


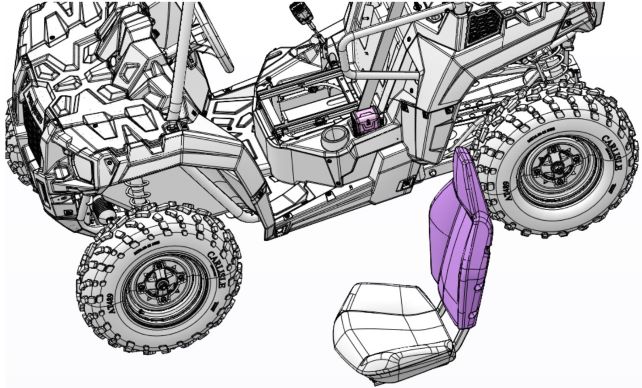
Always wear safety glasses and nitrile gloves when servicing your Polaris ACE. To access the battery in your ACE, remove the seat. To do this, push the seat release lever downward and slide the seat forward until it slides off the frame. Then lift the seat away from the vehicle. To reinstall it, reverse the procedure.
Improperly connecting or disconnecting battery cables can result in an explosion and cause serious injury or death. When removing the battery, always disconnect the negative (black) cable first. When reinstalling the battery, always connect the negative (black) cable last.
To remove the battery:
1. Remove the seat.
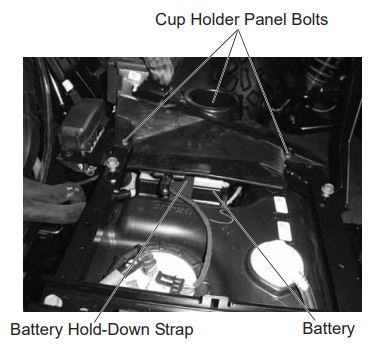
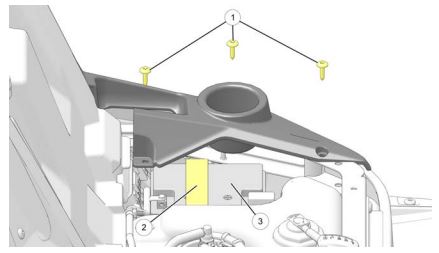
2. Using a 10mm socket, remove the three bolts (1) securing the cup holder panel to the frame. Lift the panel to access the battery.
3. Remove the battery hold-down strap screws with a 10mm socket and remove the strap (2).
4. On conventional batteries, remove the battery vent tube.
5. Disconnect the black (negative) battery cable first with a 10mm socket. Disconnect the red (positive) battery cable last.
6. Lift the battery (3) out of the vehicle. Be careful not to tip a conventional battery sideways, which could spill electrolyte. If electrolyte spills, immediately wash it off with a solution of one tablespoon baking soda and one cup water to prevent damage to the vehicle.
To install a battery:
1. Ensure that the battery is fully charged. Note that using a battery that has not been fully charged can damage the battery and result in a shorter life. It also can hinder vehicle performance. Follow the battery charging instructions found in your Owner's Manual.
2. Place the fully charged battery in the battery holder. Note the battery must be oriented so the battery terminals face toward the left-hand side of the vehicle.
3. On conventional batteries, install the battery vent tube (sealed batteries do not have a vent tube). The vent tube must be free of obstructions and securely installed. Route the tube away from the frame and vehicle body to prevent contact with electrolyte. Battery gasses could accumulate in an improperly installed vent tube and cause an explosion, resulting in serious injury or death.
4. Coat the terminals with dielectric grease or petroleum jelly.
5. Connect and tighten the red (positive) cable first. Connect and tighten the black (negative) cable last.
6. Install the battery hold-down strap and tighten the screws.
7. Verify that cables are properly routed.
8. Reinstall the cup holder panel. Tighten the bolts.
9. Reinstall the seat.
More on the battery can be found by reading Battery Charging and Maintenance Tips for Polaris Off-Road Vehicles.
For more information, see your authorized Polaris Dealer. Find a dealer near you with the Dealer Locator.
Maintenance tips, procedures and specifications can be found in your Owner's Manual.
To find diagrams and replacement part numbers, use the online parts catalog.
Unless noted, trademarks are the property of Polaris Industries Inc.
© 2021 Polaris Industries Inc.


